The best way to add storage to Amazon Fire TV Stick 4K devices is to connect external storage. Amazon Fire TV devices do not come with a lot of internal storage, and hence connecting a USB drive (to essentially get USB storage) is essential to increasing FireStick storage.
In this guide, readers will learn about how to essentially expand the internal storage of a given Fire TV device using a USB thumb drive to store media files. Users usually want to expand the storage on a Fire TV to increase the number of possible installed applications. And since there is no way to expand internal memory on Fire TV, expanding external space is the best way to increase the installed apps count.
Before going to the actual steps to take to add external storage with a USB flash drive, users should make sure to have access to the following items:
- FireStick device
- USB 3.0 (for external space)
- OTG Cable
- Rufus application
- Remote ADB shell app
Users are free to pick whatever USB device that is available at a good price. Usually, USB devices for extra space should not cost more than $10. Generally speaking, avoid USB 2.0 devices as they offer lower speeds.
Note:
Formatting the available USB device is also recommended. Make sure to format the USB drives to the FAT32 file system.How to Expand Internal Storage on Fire TV Stick 4K Via External Storage Medium
Contents
Step 1: Connect OTG Cable to USB
Take the OTG cable USB port and connect the cable to the USB drive. Then use the same OTG cable’s Micro USB end to connect to FireStick. Connect the power adapter via the female port (on the OTG cable) and then power ON the TV or the monitor.
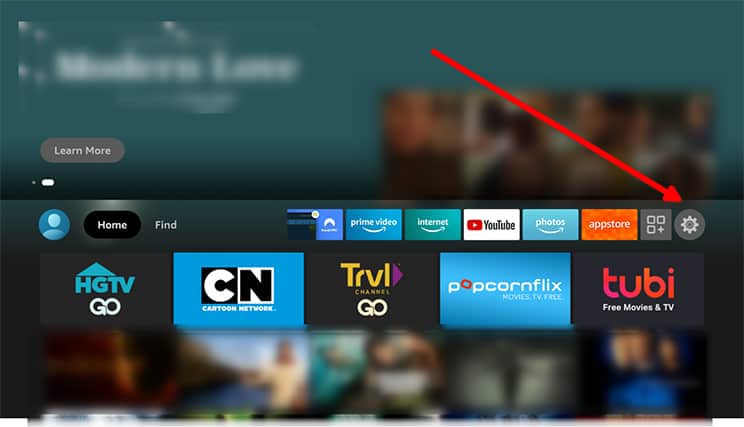
Step 2: Turn on FireStick and go to Settings
From the FireStick home screen, click on the gear icon in the right-hand corner of the screen to go to Settings.
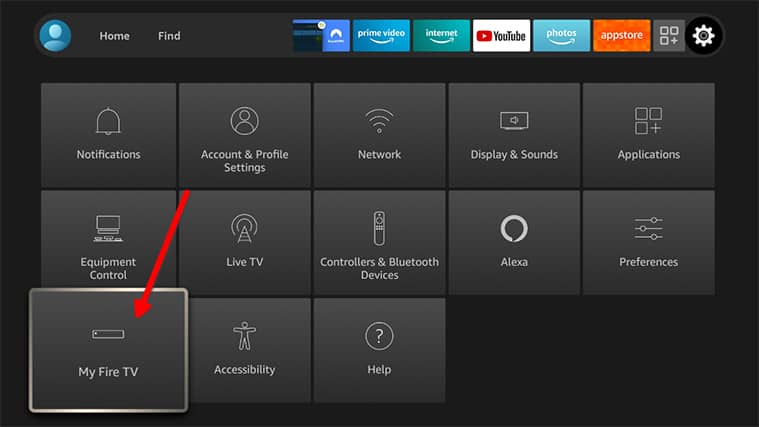
Step 3: Click on My Fire TV
Once on the Settings Fire TV section, click on the option that says My Fire TV.
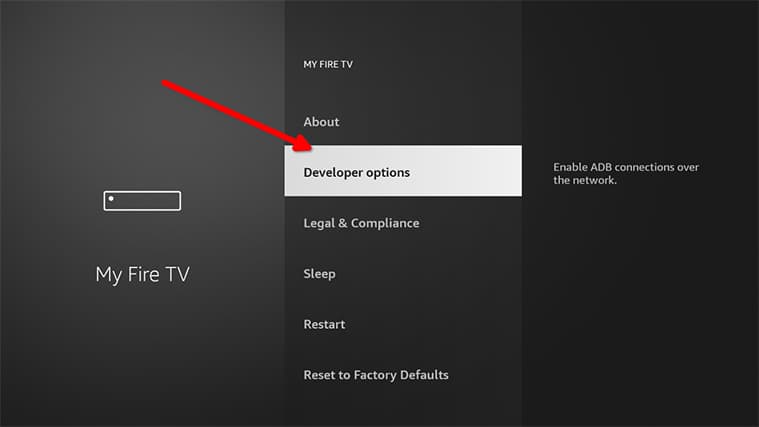
Step 4: Go to App Developer Options
There should only be four options available on the screen; click on the option that says Developer Options.
Step 5: Enable ADB Debugging and Apps From Unknown Sources
Now the screen will only show two options. Enable both ADB debug and Apps from Unknown Sources.
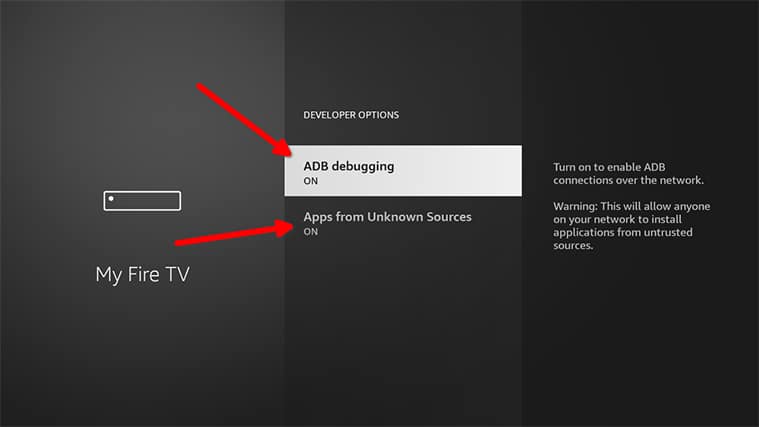
Click yes on any further confirmation notifications.
Step 6: Go to the About Section
Now FireStick streaming device users should go back to the My Fire TV Section and click on the option that says About.

Step 7: Go to Network
Users might have to scroll a little bit to find the option labeled Network. Upon accessing the Network option, users need to note down the FireStick IP address written on the right-hand side of the screen.

Step 8: Install Remote ADB App
The remote ADB application is needed to increase FireStick Storage via an external drive. The problem is that the remote ADB app, like many apps, is not available on the App Store. So for this app installation, a technique called side-loading will be used.
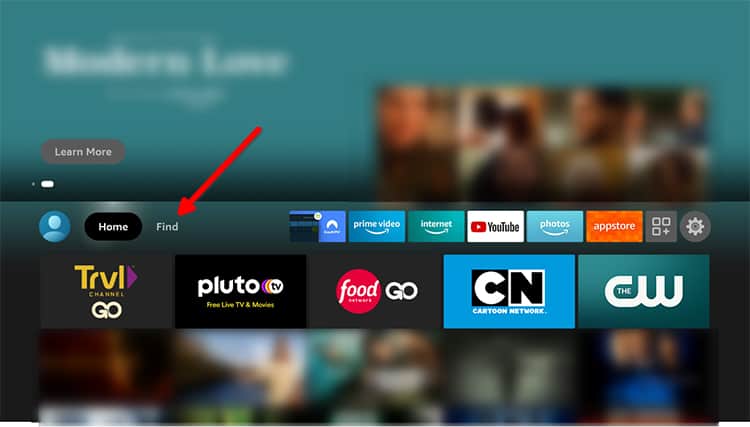
Assuming the option Apps From Unknown Sources is enabled, users need to go back to the FireStick home screen.
From there, users should click the Find option.
Then users need to click the Search option (by clicking the search icon).
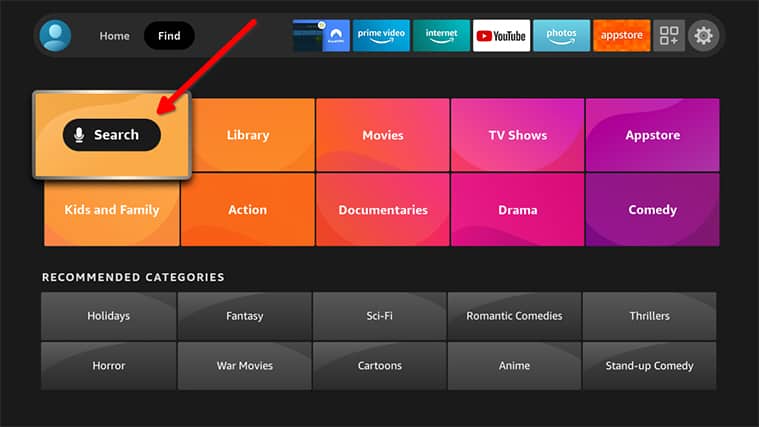
After that, input the text Downloader app (this application helps FireStick users install additional apps that are not available on the App Store).
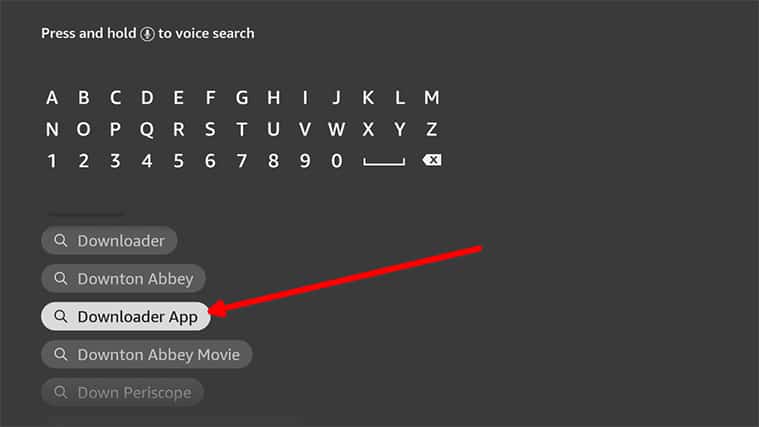
From there select the appropriate app and click the right orange tile which indicates the correct app.
Then hit the Download apps button and then click on Open once the installation is finished.
Launch the Downloader Application. Grant the Downloader application any permissions the app requires. Then skip the Quick Tour Guide screen and find the input text field for a URL. The URL text field should be available in the Home section (by default this is the section that is displayed when the user launches the app).
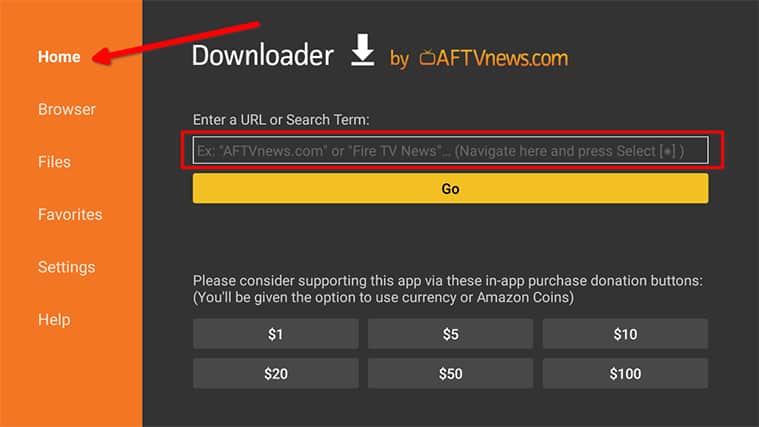
Use the URL “https://tinyurl.com/2p837f7b” in the URL text field to get the ADB application. Click the Go button as well.

Alternatively, users can go to the Browser section from the left-hand side of the screen, search for the ADB app from the browser within the application and then install the ADB app from there.
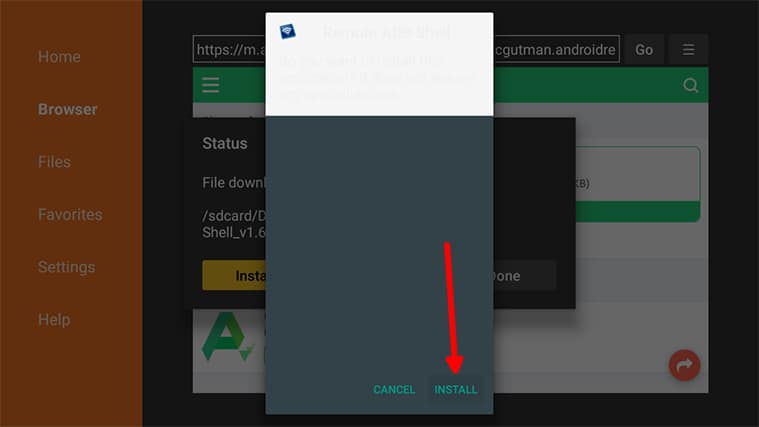
Allow the Downloader application to download and install the ADB application. Once the application shows the success message, users should click on the Install button.
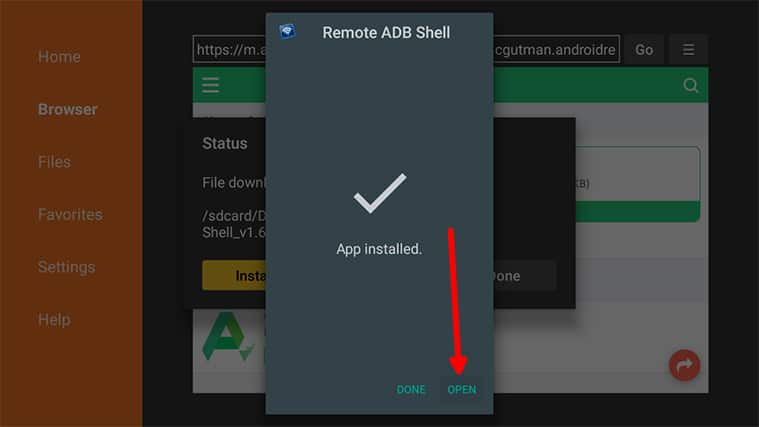
After that click on the Open button to launch the ADB application.
Step 9: Launch the ADB App and Click on OK.
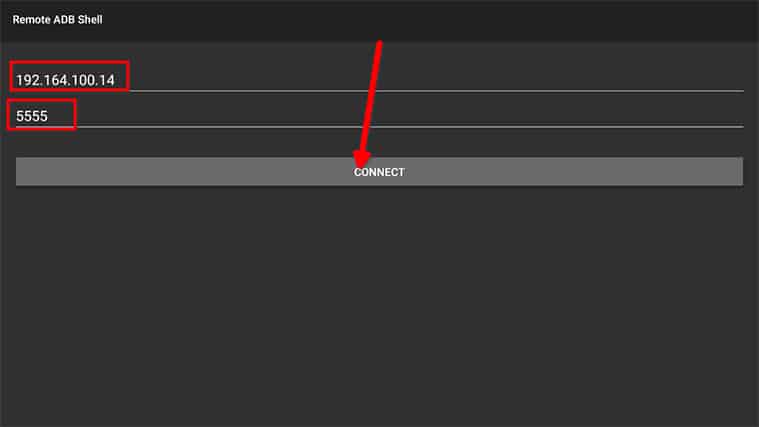
Upon launch, the ADB application will inform the user of a new New Pair Key Generated. Hit the OK button and then in the IP address text field, type the IP address that was recorded earlier (from the My Fire TV About section).

After that click on Next.
Now the user should input 5555 in the field below the one where the user entered the Firestick’s IP address. Then click on Next.
Step 10: Click Connect
Once both the input fields for the IP address and the port number have been filled with the correct entries, click on the grey button that says Connect.
Once that is done, the application will push out two notifications. One labeled Allow USB Debugging and the second, Trust This Computer. The user should hit the OK button for both options.
After that, the FireStick screen should show a Command Prompt and at the same time a Select button. Click the Select button to open the keyboard.
Step 11: Run The Command “sm list-disks”
Via the Command Prompt type the command mentioned above and then click on Run.
Step 12: Check the Disk Name
Depending on the operating system of the set-top box device, which in this case is Fire Stick, the screen should show the Disk name which may or may not be 8,0.
Write down whatever is written in front of “disk:”. Then users need to use one of the two commands mentioned below (the first one is more suitable for more users though):
The first command is “sm partition disk:8,0 mixed 50”.
The above-mentioned command is used to format all of the new storage (which the user can utilize for installing more apps and running applications). The command also makes two partitions. One partition is used as internal storage and the other one is used as external storage.
And the next command is “sm partition disk:8,0 private”. Just like the previous command, this command also formats the entire disk. But there are no multiple partitions and the FireStick recognizes the USB drive as internal storage only.
Note:
These commands won’t add any new features or remove apps but will just format the flash drive and activate it for FireStick so users don’t have to keep deleting apps all the time to make space.Alternative Method to Have Extra Storage on FireStick For Various Apps
As the file size of apps increases, FireStick storage options won’t be able to handle everything the user wants. The need for more external storage and internal storage for Fire TV Stick 4K will continue to increase.
Users can skip the tutorial mentioned above, buy a Fire TV Stick 4K Max and insert a USB flash drive in order to increase Firestick storage without any need of using commands via a command-line interface. Keep in mind that users will still need an OTG cable to connect a USB storage device with Fire TV Stick 4K Max and supply power as well. The only difference this time is that users can just pick a USB storage device, format it to FAT32, plug the USB storage into OTG micro-USB cable and a USB notification on FireStick should show up.
Then users can go to Settings > My Fire TV > USB Drive > Format to Internal Drive to have the facility of moving installed applications to external storage (which the Fire TV Stick 4K Max will recognize as internal storage).
Any application that supports internal storage and that supports operation from an external storage device will have a USB icon right next to the app’s name.

Fire TV Stick 4K Max users can go to My Fire TV > USB Drive > Manage Installed Applications and tap on any application to move the application from internal storage to external storage.
With that said, there will always be apps that just won’t move to the USB drive from Fire TV 4K Max. One of such apps is Netflix. To move such applications like this out of internal storage and into the USB drive, follow the steps given below:
Step 1: Download X-Plore File Manager
To get started on moving applications that won’t move to USB from the FireStick menu, first users need to install X-Plore File Manager.
Users should follow the same general procedure to get the X-Plore File Manager. Just briefly, go to Fire TV Stick home screen > Find > Search > search for X-Plore File Manager > Download > Open.
Step 2: Go to App Manager in X-Plore File Manager
After the installation process is complete, users should launch the X-Plore File Manager and then from the main window find the option that says App Manager.
Step 3: Click on Installed
Once the user clicks the App Manager item, a sub-menu should open up right below it.
From there users should click on Installed.
Step 4: Find Netflix
Upon clicking the option labeled Installed, a new list of installed apps should open up below it. From there find the item that says Netflix and then press the icon that says Copy to Clipboard (present among the icons located in the middle panel).
This option is present just above the Root item in the left-side pane. The Root option is just above the Apps Manager.
Step 6: Press Download
Upon clicking the Internal Shared Storage option, another list should open up which should have another option labeled Download. Press and hold on the Download item until the Paste button (in the middle panel) turns bright. Then press Paste.
Step 7: Uninstall Netflix
For the next steps to work, the user has to uninstall Netflix in case Netflix is already installed.
So go to Fire TV settings and then to Applications. From there click on the option that allows users to manage installed applications. Then click the item that says Netflix and then uninstall.
Step 8: Run X-Plore File Manager
Now users need to launch the X-Plore File Manager again. To do that, simply go to the Fire TV home screen and click on X-Plore Manager from the recently installed application bar shown on the right side of the Find button.
Note:
At this point it is a good idea to make sure Apps From Unknown Sources in the Fire TV settings is enabled.Step 9: Tap Netflix APK File
The screen should be at the same place where the user left it. If not, then users first have to go to the Apps Manager and from there to Installed and then Netflix.
Once there, click on the Netflix APK file. That should install Netflix on the external storage instead of internal storage.
This was the whole process for running apps from external storage instead of internal storage on Fire TV Stick 4K Max.
Now, the process for the regular Fire TV Stick 4K is a bit different.
Assuming users have installed the Remote ADB Shell app from before the process is simple enough.
First, launch the ADB Shell application and from the command prompt type the command,
“df -h”.

Users need to find the ID of the USB drive to which the application needs to be transferred. The ID can be found from what’s in front of the /mnt/partition. The ID should come in the form of a long string consisting of numbers and alphabets. Users can find the /mnt/ partition bit in front of the line on the command prompt that says “/dev/block/dm-2”.
It should be easy to find because after using the df -h command, there should be nothing like the ID string on the screen. Remember, the ID is a pretty long string and is usually present in front of wherever it says “/mnt/expand/ID”. Replace the ID portion with the actual ID string.
Once the ID has been noted down users need to use the command,
“pm list packages”.
This will show all the packages on the Fire TV device. Scroll to find the application to be moved to the USB drive. The name of the application package should come in the form of (assuming the application to be transferred is UFC) com.neulion.firetv.ufc.android.amazon.

Once both the ID and Android package names have been noted down, the user needs to use the following command,
pm move-package com.neulion.firetv.ufc.android.amazon ID (noted down at the beginning of this step).
If the steps have been followed correctly, the Fire TV Stick device should show a success notification.
Users can go to Settings and then to Applications and then to Manage Installed Applications and check if the desired application has moved to the USB drive. As mentioned before, any application that is on the USB drive will have a USB icon in front of it.
