You’ll be glad to know that almost all FireStick audio sync problems can be fixed with simple solutions. So to kick things off, we recommend that you start using the VLC player for media playback. That alone fixes many audio/video sync or delay issues.
If you’ve already done that, the next step is to make sure your firmware is updated. It seems simple, but sometimes all you really need is a firmware update to fix FireStick audio delay issues.
And while you’re at it, be sure to get rid of any extra cords that you may be using to connect FireStick video or audio to your monitor or TV. Extra cords certainly have their place, but sometimes they can cause issues with audio lag or delay.
Amazon itself has taken notice of the problem (likely meaning it’s fairly prevalent among both newer and older models) and now allows users to adjust video and audio synchronicity manually. With the new feature, users can slow down or speed up audio or video content to get rid of the audio sync issues.
Note:
Keep in mind, though, that this feature is only available in models that were made for the year 2020 and beyond. It’s also available on the Amazon FireStick Lite device.If you have an older device, the solutions listed below will certainly help.
Use the Lip Sync Tuning Feature (Only Available in New Models)
Contents
Here are the steps you need to take.
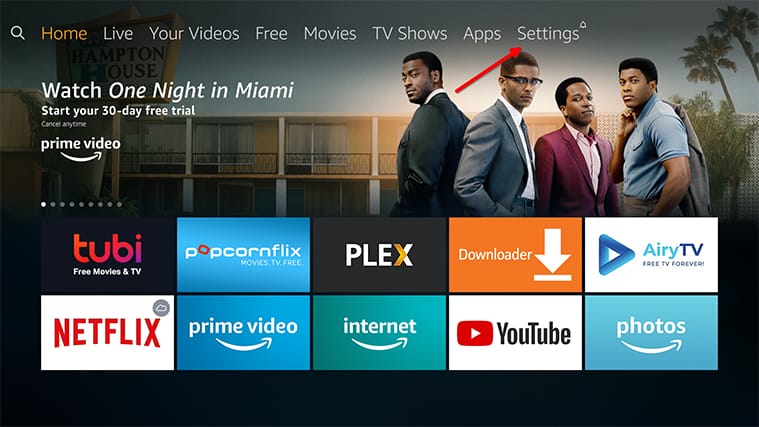
Step 1: From the Home Screen, Go to Settings

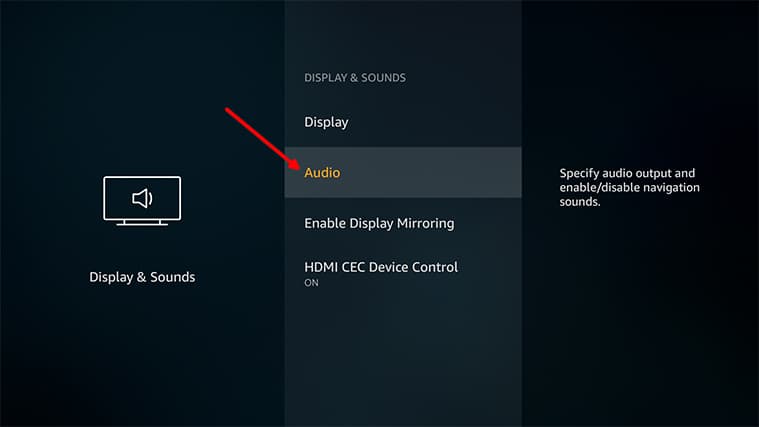
Step 2: Click on Display and Sounds
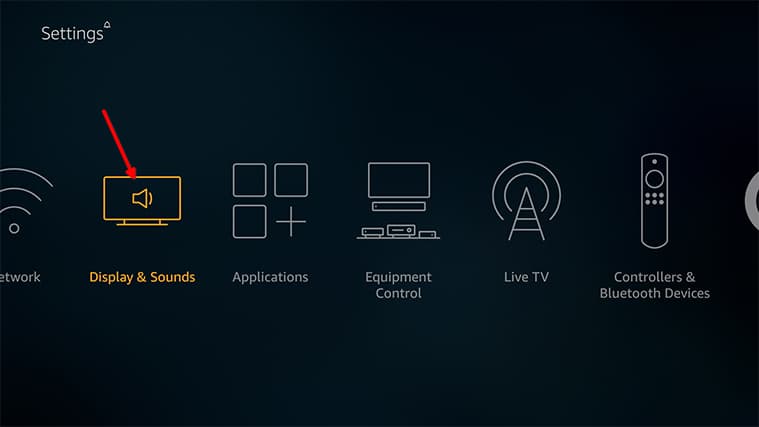
Step 3: Find and Click Audio
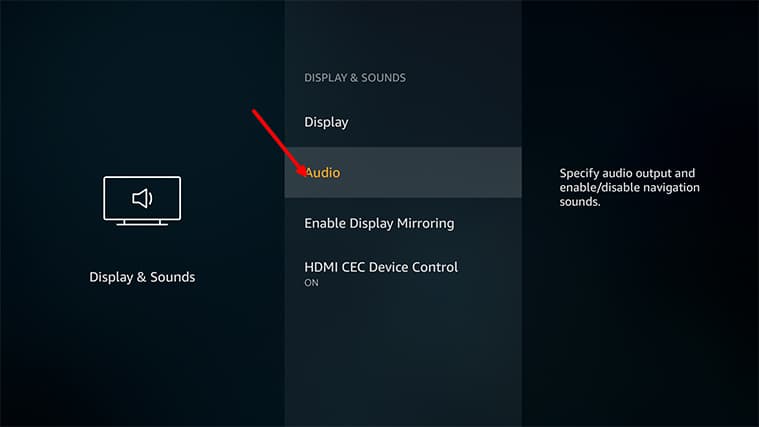
Step 4: Click AV (Lip Sync) Tuning

It will provide clear directions on how to get video and audio in sync while playing content on your device. Depending on your FireStick model, you may see a bouncing ball and a rectangular bar. The screen may also generate a beeping sound.
If you hear the beep exactly when the ball collides with the rectangular bar, that means your Fire TV device audio video is in sync and you don’t need to use the lip sync tuning feature. If the sound is not in sync, all you have to do is adjust the position of the rectangular bar. Continue adjusting the shown slider until the audio lag issues are resolved.
Again, not all models have the lip sync tuning feature, so read on for more ways to fix audio-video lags through your Amazon Fire TV device’s settings.
Enable Stereo on Your FireStick System
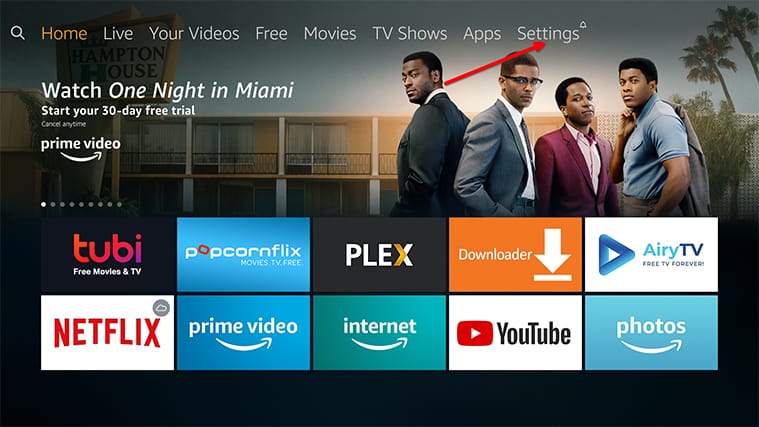
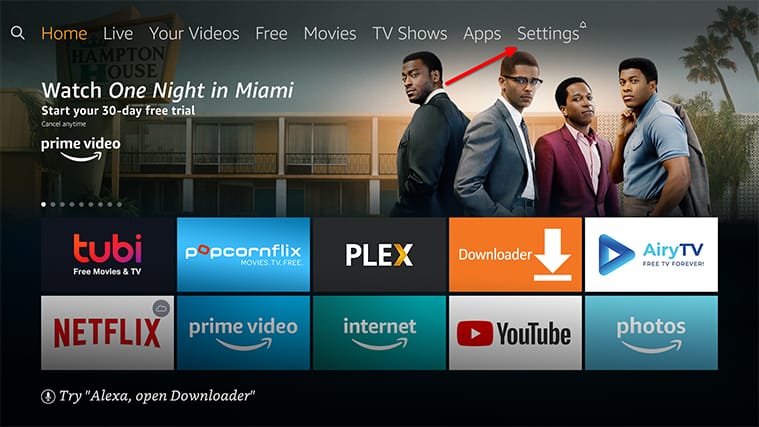
Step 1: Go to Settings
From your Fire TV home screen, click on the Settings option in the top-right corner of the screen.
Step 2: Go to Display and Sounds
From the Fire TV Settings menu, click the option that says Display And Sounds.

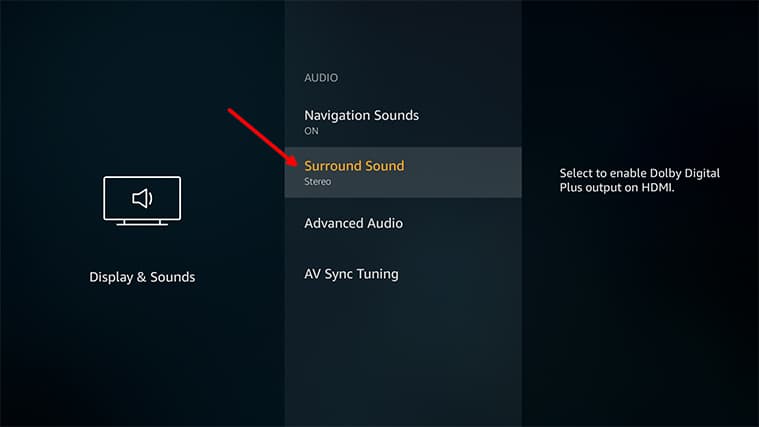
Step 3: Click on Audio
From the next screen, click Audio.
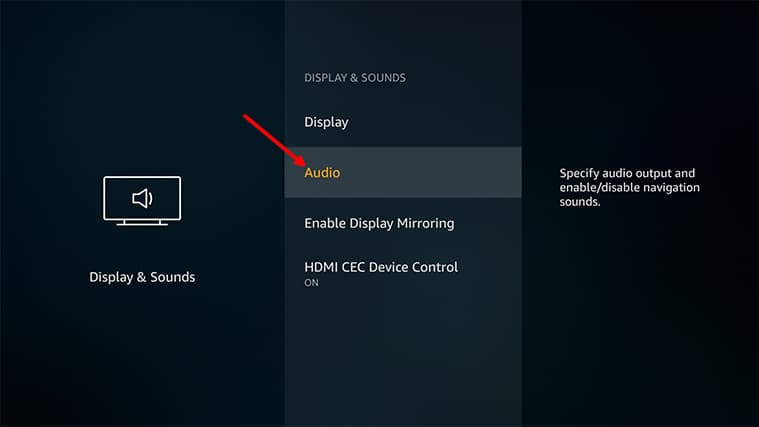
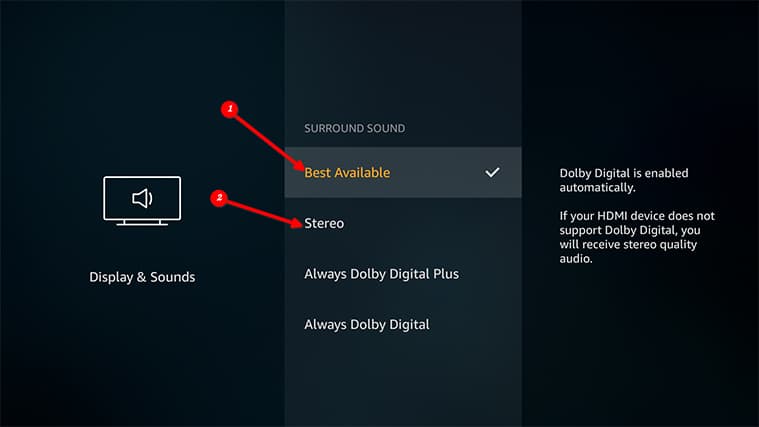
Step 4: Click on Surround Sound
You’ll see a couple of options on the new screen. Click the one that says Surround Sound.

Step 5: Click on Best Available
The new screen should show you four or five different options for Surround Sound. Click the one that says Best Available to disable it and then click on Stereo to enable it.
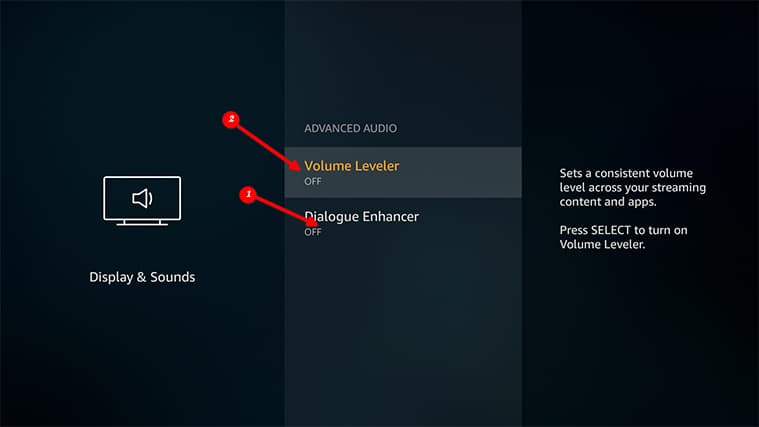
Step 6: Go Back to Advanced Audio
You will need to go back a couple of screens to where you see options such as Navigation sounds, Advanced Audio Options, and Surround Sound. Click on the Advanced Audio setting.

Step 7: Turn off Dialogue Enhancer and Volume Leveler
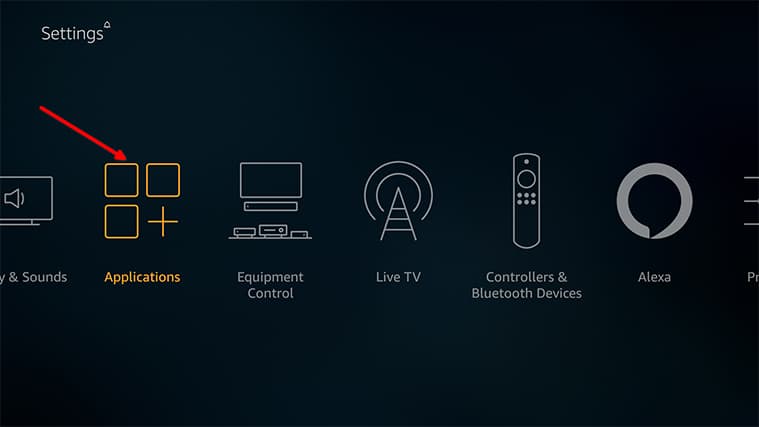
Step 8: From the Settings Option, Select Applications
Make your way back to the Settings menu. From there, select the Applications option.

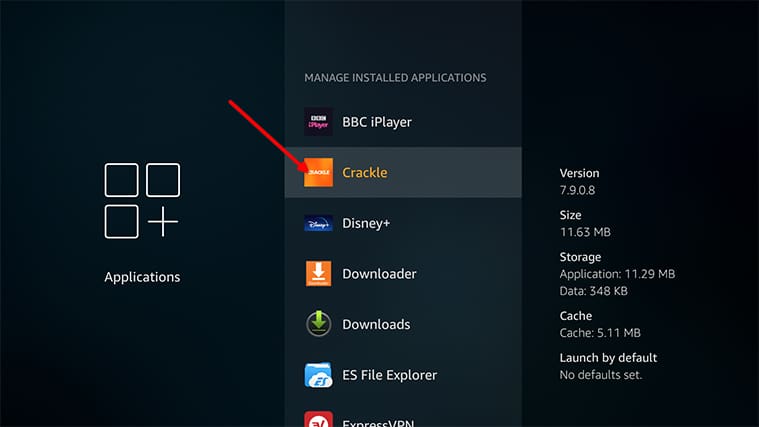
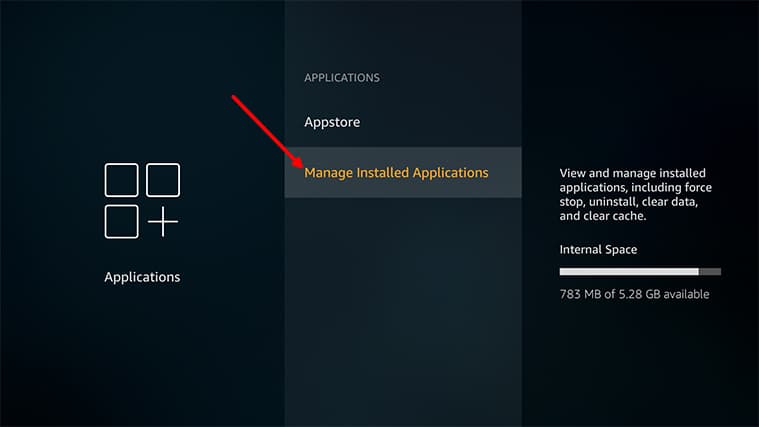
Step 9: Click on Managed Installed Applications

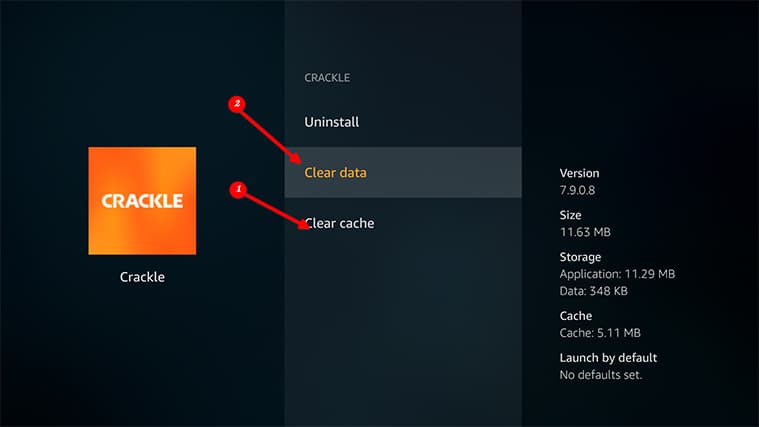
Step 10: Select the Problematic App and Clear the Cache
From the shown list, choose the app (or apps) that is presenting audio syncing issues.
From the app’s menu, hit the Clear The Cache button.
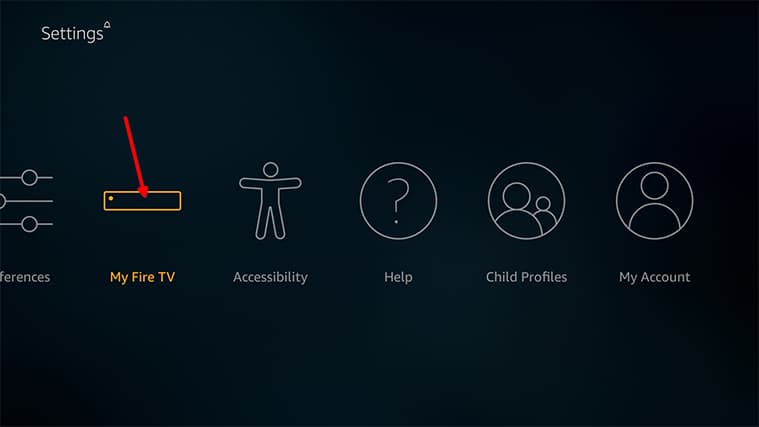
Step 11: Click on My Fire TV From the Settings Menu
Go back to the Settings menu and scroll to the right until you see the My Fire TV device setting. Click it.
Step 12: Find and Click the Restart Option
Confirm the action if your Fire TV device asks you to.
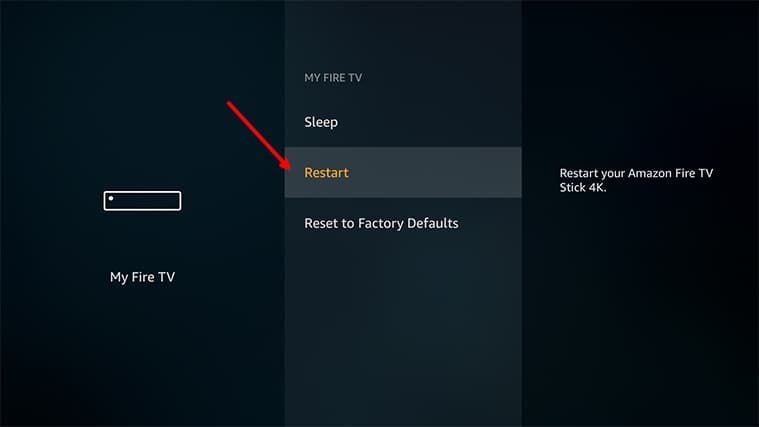
After a couple of minutes at the most, you should have reset your device and resolved the Fire TV audio syncing issue.
Turn Off Dolby Digital
You can significantly enhance the quality of your Fire Stick audio by simply enabling the Dolby Digital audio technology option if your TV or monitor supports it.
The only problem is, some Fire Stick users have reported that this feature can cause the same audio and video sync issues we’re working to fix in this guide.
So, take the following steps to turn it off on your Fire TV device:
Step 1: Go to Settings
From the Fire Stick/Fire TV home screen, click on the Settings option in the top-right corner.
Step 2: Go to Display And Sounds

Step 3: Choose Audio From the Next Screen; Then Click Surround Sound
Step 4: Choose Dolby Digital Output
Step 5: Change the Dolby Digital Plus Value To ‘Off’
And that should solve the Fire TV Stick audio and video delay problem.
Be Careful About Content-Format And Type
Audio and video sync problems on FireStick can also arise because of the content you choose to stream. Make sure you aren’t experiencing audio and video sync problems while playing specific types of content. If so, the problem is not with FireStick but with the content you are playing.
Note:
While Amazon FireStick is a very versatile streaming device, it doesn’t support every type of content. You need to make sure you’re playing optimized content on your FireStick.Some apps available on the Amazon Fire TV App Store can take care of optimizing content for your FireStick. But if you’re trying to play something off a USB or third-party website, then the burden of optimizing content is on you.
Force Stop the FireStick App That’s Giving You Audio Lag Issues
Sometimes, the audio sync issue only pops up when you’re using specific apps. If so, try to force-stop the problematic app to see if the problem goes away.
Step 1: From Your Home Screen, Go to Fire TV Settings
Step 2: Go to Applications
Step 3: Select Managed Installed Applications
Step 4: Click the Problematic App

Step 5: Tap Force Stop
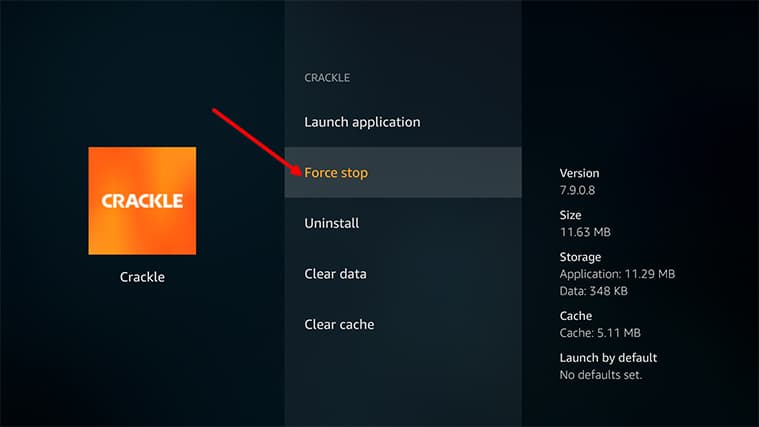
This should close the problematic app and solve the audio sync problem. Don’t forget to use the Launch option to reopen the app after you have forced it to close.
Conclusion
Hopefully, these steps helped you resolve the audio and video issues you’re experiencing on your Amazon Fire Stick or Fire TV device. If our solution didn’t work, please use the comments section below to let us know.
