Today we are going to learn how to install Kodil Repo on Kodi 18/18.2 Leia. Everybody knows that Kodil Repo is considered to be one of the best and popular repositories as per the current trends. Also, when it comes to Kodil repo, you can find a number of Kodi add-ons which can be installed in a single tap. Here are some of the steps that are needed to be followed when it comes to installing the Kodil Repo on Kodi 18/18.2 Leia.
Kodil Repo 2019 (Overview & Location)
Contents
- Repository Name – Kodil Repo
- Repository URL (Address) – http://www.lvtvv.com/repo/
- compatibility – Kodi 17.6 & Kodi 18/18.1/18.2 Leia
How to Install Kodil Repository on Kodi 18 Leia
Kodil Repository offers 90+ Kodi add-ons in various categories. Follow the below steps to install Kodil repo on latest Kodi version of kodi 18.2 Leia.
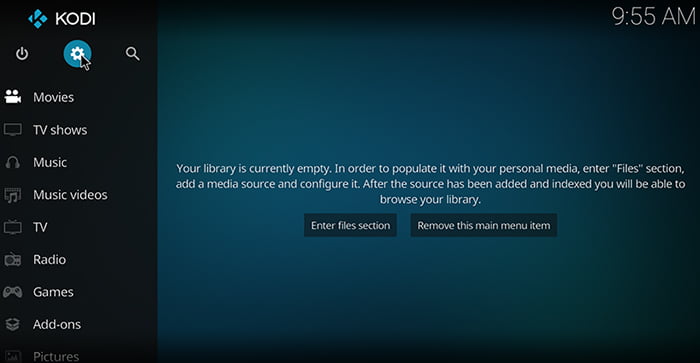
Step 1: In the beginning
When you are about to start the installing of kodil repo, a small gear icon is present on the top left-hand side of the screen. Just click on this small gear available, this will help you to reach the Kodi system page
Step 2: Kodi Settings
Enable the option of unknown sources. This option was disabled by developers. The installation from the third party is not allowed directly. Whether you are installing the application on Android, firestick, Linux, Windows, iOS, Raspberry Pi or any other device. The UI for this application is exactly the same. Just click on the gearbox icon and you will reach the settings.
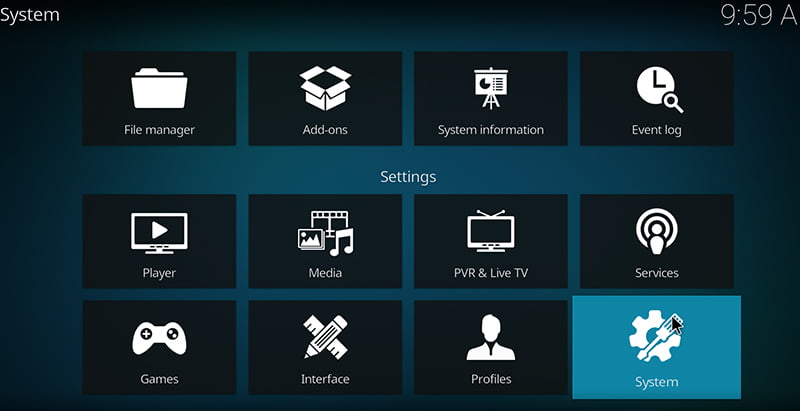
Step 3: System settings
To reach the option of unknown settings one must suppose to click on the system settings
Step 4: Add-ons
This option is present on the left side. Click on the add-ons a dialogue box will appear.
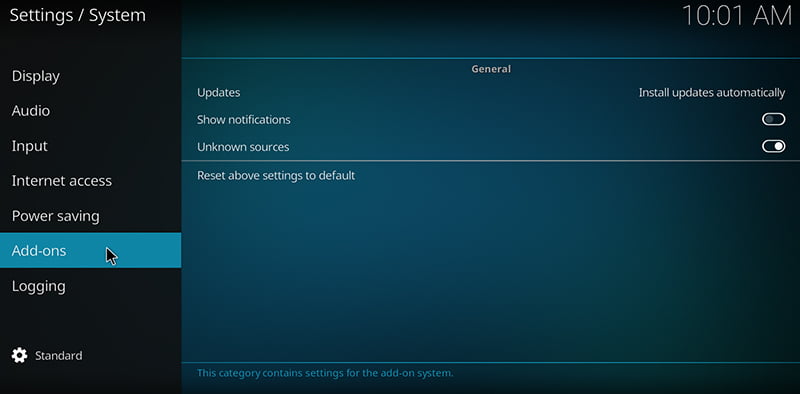
Step 5: Unknown sources
The dialogue that will appear after clicking on addons, there you will find the option of unknown sources.
Click on the unknown sources option. A popup will appear that will indicator warning.
Step 6: Click yes in the popup
As mentioned in the last step a pop up will appear indicating a warning just ignore the warning and click on yes. Once you will click on yes the installation from unknown sources option will be enabled.

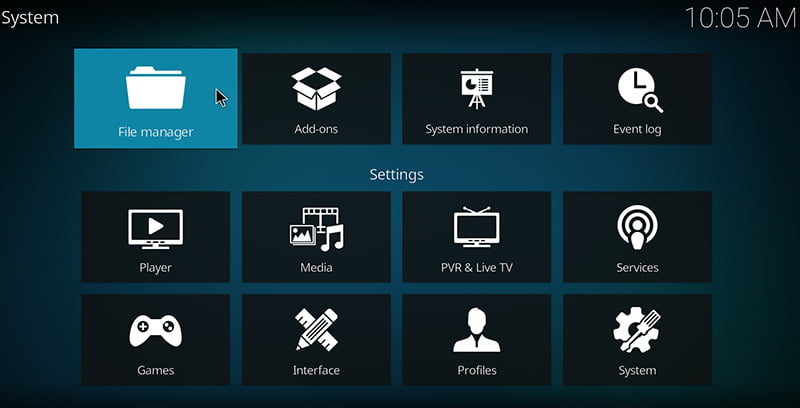
Step 7: File manager
When you are done with the unknown sources option go back and click on the File Manager option. The downloading address of the repository file will be available here.
Step 8: Add source
Click on the add source option and insert the repository address.

Step 9: Click on none
Now a path for Kodi repository is supposed to choose. Select the options <none> and enter the repository address available with you.
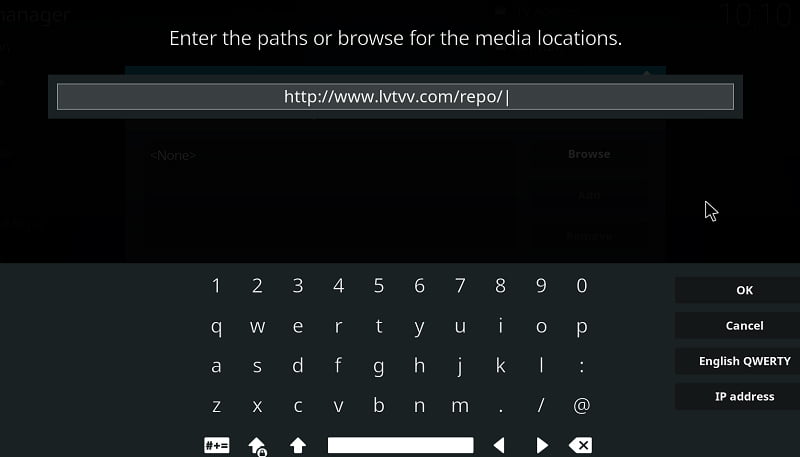
Step 10: repository address
The bar where you are supposed to copy the address, just enter http://www.lvtvv.com/repo/. After entering the address click on Ok.
Step 11: Repository name
Now the Kodi is asking for the repository name. In that particular bar, type “kodil repo“.
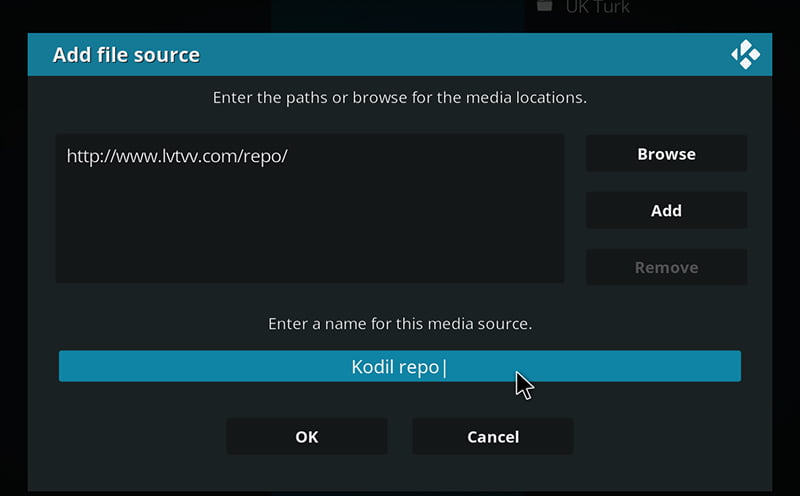
Step 12: click ok
When you will get done with entering of the repository name, just click on the ok button.
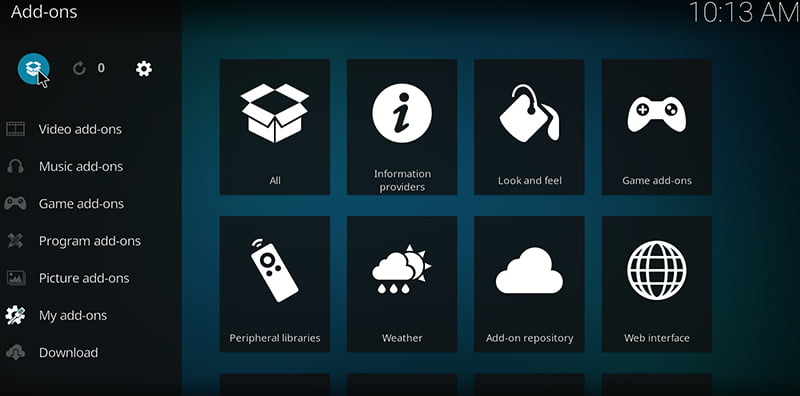
Step 13: add-ons
When you will get done with the entering of repository name and the address, now you are supposed to go back to the Kodi home. Here is an option available by the name add-ons.
Step 14: package installer
A small package icon is available on the top left of the screen just click on it after clicking on it it will bring you to the add-on browser of Kodi.
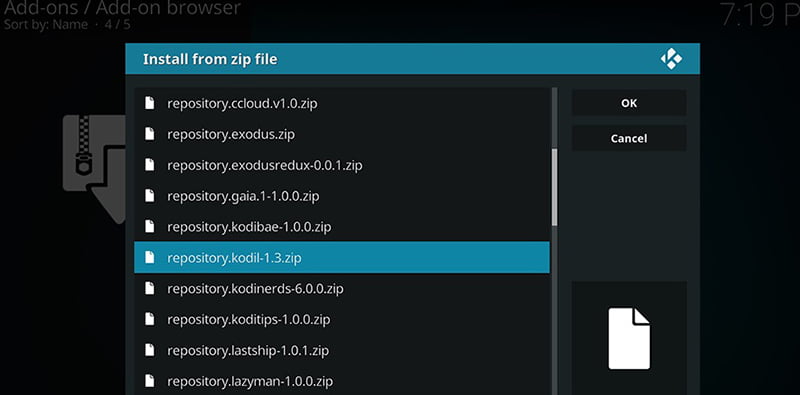
Step 15: zip file
After clicking on the add-on browser there is an option available by the name install from the zip file, choose it.
Step 16: after clicking on install from zip file there you will see an option of the file shows that you have been created previously. Look for the folder that you have created (Kodil repo) and click on it.
Step 17: choose file
From this location choose the repository file you made. Make sure to choose the correct file that you have created. If you will find a problem in getting your file just scroll down till the last and find repository.kodil-1.3.zip.
Step 18: once you will get done with the choosing of the file just click on it and installation will start.
Step 20: installation is complete and successful then you will see a small icon appearing on the top right-hand side of the screen. This will indicate that the installation has been completed.
Step 21: once it has been installed now go back to the add-on browser page and click on the option install from repository.
Step 22: scroll down through the content and you will find the option of the kodil repository.
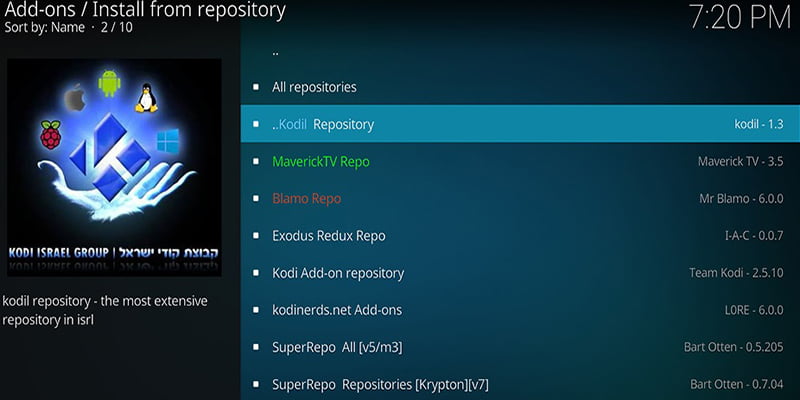
The installation has been completed and now you are supposed to use it according to your desire.
Final Words
Here we have demonstrated how to install Kodil repo on Kodi 18.2 Leia with visual images. This guide also works for other Kodi versions including Kodi 17.6 krypton and Kodi 18/18.2 Leia. Beta version of Kodi 19 is released but I haven’t tried it yet! Still, have a doubt? Feel free to comment down below.
Don’t Miss:
